Hand Tossed Pizza Dough Recipe: Perfect Crust Secrets!
For a classic hand tossed pizza dough, combine 4 cups of flour with 1 tsp of yeast, warm water, and salt. Knead until smooth, let rise for 1 hour, then shape and toss.
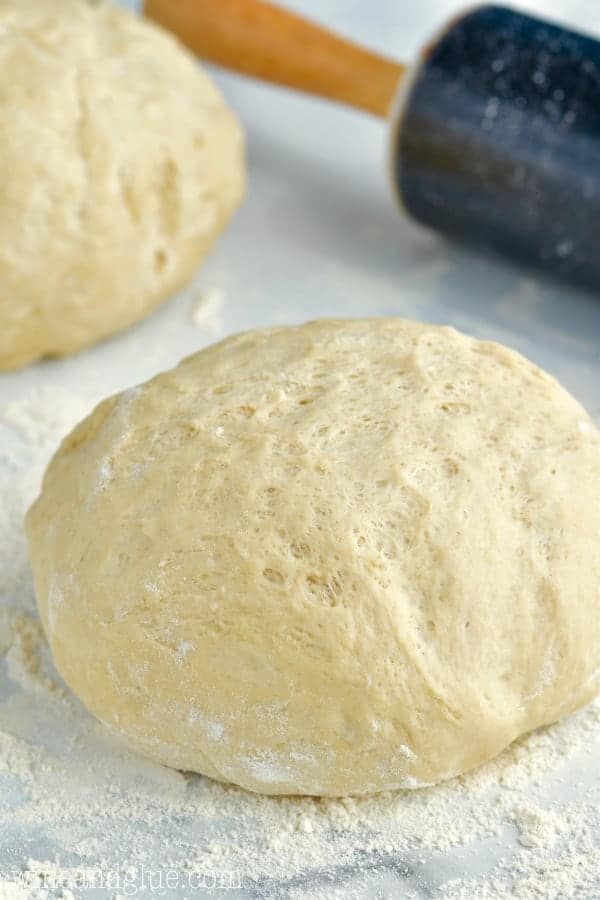
Creating the perfect hand tossed pizza dough can elevate your homemade pizza to pizzeria-level excellence. It begins with high-quality ingredients and a simple yet precise technique. By using just a few fundamental ingredients – flour, yeast, water, and salt – you form the base of a versatile dough that accommodates any topping you desire.
This recipe yields a dough that’s both chewy and crispy, providing an authentic pizza experience in the comfort of your own kitchen. Follow the steps carefully to ensure your pizza base is light, airy, and ready to be topped with your favorite ingredients. Remember, the key to a great hand tossed pizza begins with the dough!
Credit: www.withspice.com
The Art Of Hand Tossed Pizza Dough
The Art of Hand Tossed Pizza Dough traces its roots back to the skilled pizza makers of Italy. Mastery in this craft transforms simple ingredients into a spectacle of taste and texture. The secret lies not just in the recipe, but in the technique. Hand tossing a pizza dough has an allure all its own, with a tradition as rich and savory as the pizza it creates. Let’s explore the essentials of this time-honored practice and learn how to create your very own perfect base for that delicious pizza pie.
Creating The Perfect Base
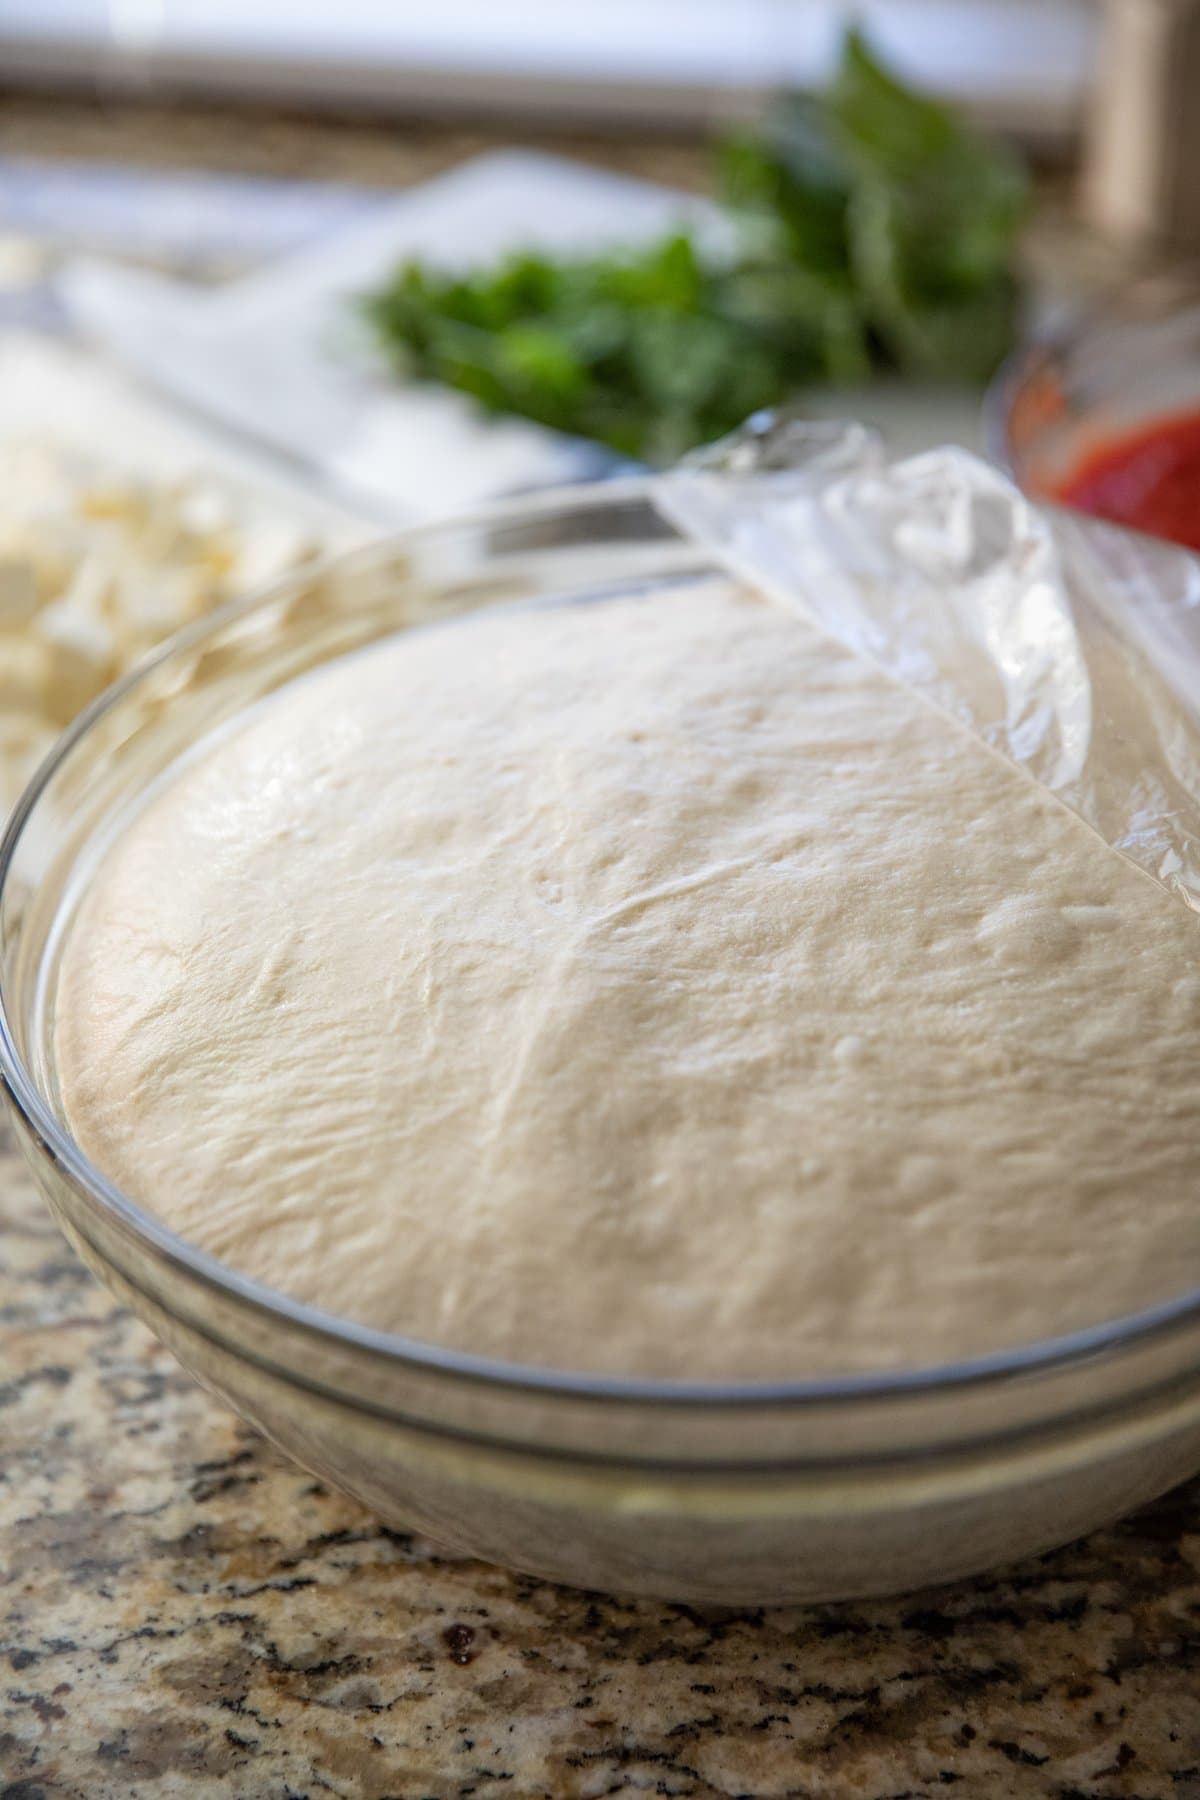
The foundation of any great hand-tossed pizza starts with crafting the perfect base—the dough. Precision in kneading and care in letting the dough rise are vital steps. Begin by finding a flat, clean surface to knead your dough. Push, fold, and turn until the dough is smooth and elastic. A well-kneaded dough ensures a crust that is both chewy and crisp. Let the dough rise until it doubles in size to guarantee a light and airy crust.
- Flour: Use high-protein flour for elasticity.
- Yeast: Active or instant yeast will work.
- Water: Lukewarm to activate the yeast.
- Salt: Adds flavor and regulates yeast.
- Olive Oil: For a tender crumb and crispy crust.
Remember to let the dough rest after kneading. This relaxes the gluten, making it easier to shape without tearing.
Ingredients That Make A Difference
Quality components are the secret to a flavorful dough. Each ingredient should be chosen with care.
| Ingredient | Purpose | Tip |
|---|---|---|
| High-Quality Flour | Strength and structure | Opt for ’00’ flour for authentic texture. |
| Pure Water | Hydration | Filtered water can affect taste positively. |
| Sea Salt | Flavor enhancement | A pinch goes a long way. |
| Live Yeast | Rising agent | Fresh yeast yields better fermentation. |
| Extra Virgin Olive Oil | Tenderness and taste | Add a drizzle for richness in flavor. |
Invest in the finest ingredients for a difference you can taste and see. Combine them according to your recipe, and witness the magic as your dough rises, full of flavor and texture.
Kneading Techniques For Supple Dough
Creating the perfect hand tossed pizza dough is an art. The backbone of this art is kneading technique. Proper kneading develops the dough’s gluten. This gives your crust that chewy, airy texture everyone loves. Let’s explore how to knead your way to a supple pizza dough.
The Role Of Gluten
Gluten strands give dough strength and elasticity. When flour mixes with water, gluten proteins bond. Kneading aligns these proteins, creating a network that traps air. Gluten is key for dough that rises well and bakes up light and airy.
Step-by-step Kneading Guide
- Measure all ingredients precisely before starting.
- Mix until ingredients form a rough dough.
- Flour your surface to prevent sticking.
- Press with the heel of your hand, pushing the dough away from you.
- Rotate your dough 45 degrees after each push.
- Fold the top third of the dough back over itself.
- Repeat pressing and folding for about 8-10 minutes.
- Feel for a soft, smooth texture, a sign of well-kneaded dough.
- Let the dough rest to allow gluten relaxation.
With these steps, patience, and practice, you’ll make perfect pizza dough every time.
Secrets To A Flavorful Crust
Crafting the perfect hand tossed pizza dough is an art. The secret behind a memorable crust lies not only in the recipe and technique but also in understanding how flavors develop. The journey to a savory and aromatic crust starts with two key elements: fermentation and the infusion of flavors.
Fermentation FundamentalsFermentation Fundamentals
Fermentation is the heart of the dough’s flavor. This slow process allows yeast to consume sugars, creating alcohol and carbon dioxide. The by-products add depth to the crust’s taste.
For a flavor-packed crust:
- Use high-quality yeast – It contributes to a better rise and taste.
- Long, cold fermentation – Slow ferment in the fridge for 24 to 72 hours.
- Controlled temperature – Keep dough at a consistent cold temperature.
Infusing Aromas And Tastes
Adding herbs and spices directly to the dough infuses it with aromatic flavors.
To enhance your crust, consider:
| Ingredient | Flavor Profile | Quantity |
|---|---|---|
| Olive Oil | Rich and fruity | 2 tablespoons per cup of flour |
| Fresh Basil | Sweet and peppery | 1 tablespoon finely chopped |
| Garlic Powder | Savory and pungent | 1 teaspoon |
Experiment with ratios to suit your palate. These small touches make a big difference in delivering a crust that stands out.
Tossing Like A Pro
Ready to take your homemade pizza to the next level? Tossing pizza dough like a pro is not just fun; it adds that authentic pizzeria texture everyone loves. Mastering the art is easy with a few tips and tricks.
Mastering The Toss
Before you start, make sure your dough is at room temperature. Warmer dough stretches better. To begin, form a small rim by pinching around the edges. Now, place the flattened dough onto your knuckles. Keep your fists close together to support the dough’s weight. Start off slowly; use a gentle up-and-down motion to coax the dough into stretching.
Patching And Spinning Tips
- Small holes? No problem! Just pinch the dough gently back together.
- Even spinning is key. Practice tossing with a damp dishcloth to get a feel for the motion.
- Use swift, confident motions. Hesitation can lead to tearing.
Thickness And Edge Tricks
For an even base, keep the dough moving. Rotate it frequently as you toss. Aim for a thickness of about 1/4 inch; a thin center cooks quickly, creating a crispy and chewy texture. Always leave a thicker edge to hold your toppings.
| Part of Pizza | Thickness Goal |
|---|---|
| Center | 1/4 inch |
| Edge | 1/2 inch |
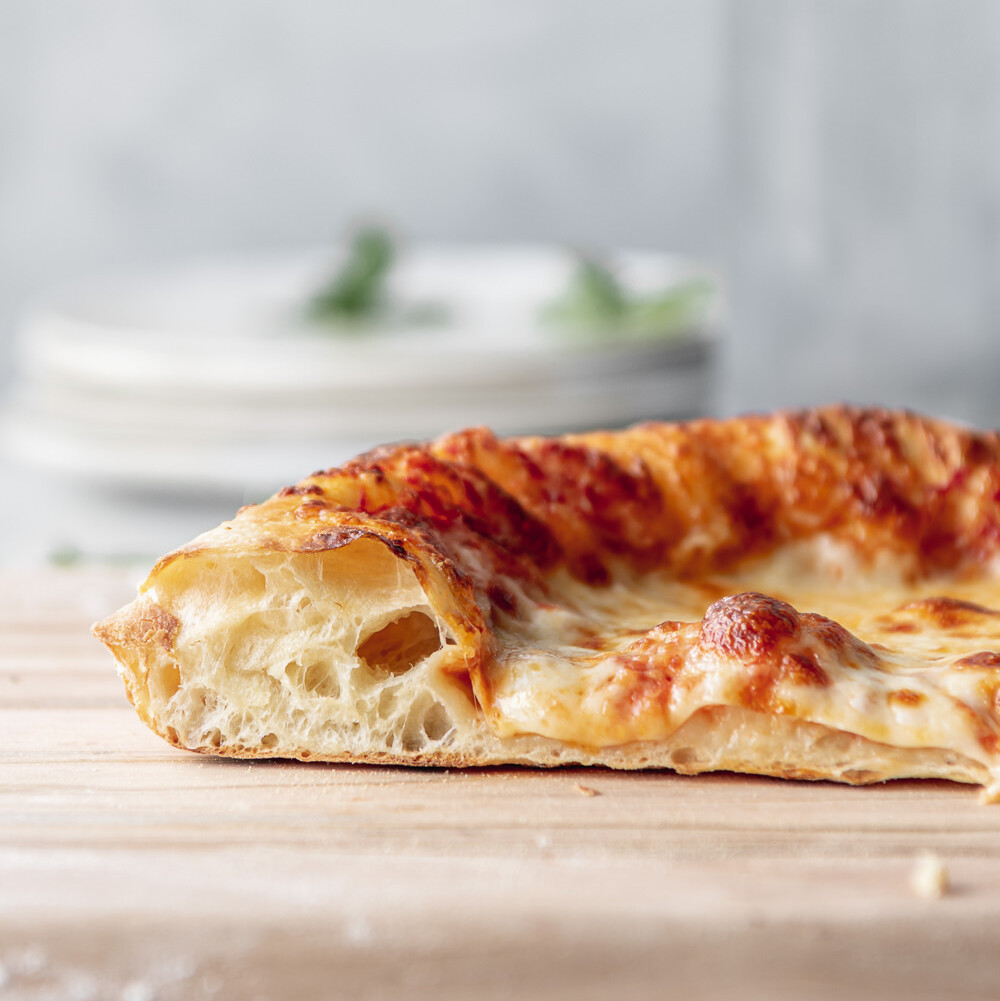
Cooking Methods For The Ultimate Bake
A perfect hand-tossed pizza all begins with the bake. Whether it’s your first time trying out homemade dough or you’re a seasoned pro, the right cooking method can elevate your pizza from good to great. Dive into oven settings, stone versus pan baking, and unleash the flavor and texture that will have everyone craving a slice.
Oven Settings And Temperatures
The secret to a delectable pizza crust is in your oven settings. Preheat your oven for at least 30 minutes before sliding in your pizza. This step is vital for a crisp base. Aim for an oven temperature of 475°F to 500°F (246°C to 260°C).
- Convection Bake: Use this setting for even heat distribution.
- Regular Bake: Choose this for a softer crust.
Keep an eye on the crust. Golden brown edges mean it’s ready!
Stone Vs. Pan Baking
Baking stones mimic brick ovens. They give a crispier crust. Pans, on the other hand, are more convenient. Let’s compare:
| Baking Stone | Baking Pan |
|---|---|
| Heat retention is superior | Easier to handle and clean |
| Requires preheating | No preheating needed |
| Best for a crispy crust | Yields a softer, chewier crust |
For best results, place the stone in the oven during preheating. If you’re using a pan, you can skip this step. Just dress your dough with toppings, and it’s ready to go.
Credit: laurenslatest.com
Customizing Your Pizza Crust
Imagine biting into a pizza crust that’s the hallmark of your culinary creativity. Customizing Your Pizza Crust offers a canvas for bakers at any level to infuse personal flair into their homemade pizzas. From herb-infused delights to whole-grain health boosts, the possibilities for tailoring your crust are endless. Follow these ideas to make a crust that guests will remember long after their last bite.
Flavor Variations
A dash of herbs or a pinch of spices can transform your dough into a fragrant masterpiece. Experiment with seasonings you love, blending them into the dough before it rises. Consider these popular options:
- Garlic Powder: For a punchy twist.
- Italian Seasoning: A classic choice that pairs well with any topping.
- Crushed Red Pepper: A hit of heat for spice enthusiasts.
Consider sprinkling grated parmesan or seeds like sesame or poppy for texture and taste.
Healthy Alternative Ingredients
A healthier pizza begins with the crust. Whole grains and alternative flours offer a nutritious backbone for your toppings.
| Ingredient | Benefits |
|---|---|
| Whole Wheat Flour | Rich in fiber and nutrients. |
| Almond Flour | Low in carbs, high in protein. |
| Coconut Flour | Gluten-free, adds a hint of sweetness. |
Start with a small substitution to test the balance between health benefits and the taste you love. A 50:50 mix of flours often works well.

Credit: www.withspice.com
Can the Hand Tossed Pizza Dough Recipe be Simplified for Kids to Make?
Yes, the hand-tossed pizza dough recipe can be simplified for kids to make. With an easy homemade pizza dough recipe, kids can enjoy getting their hands dirty and learning the basics of making their favorite pizza from scratch. Simplifying the steps and using basic ingredients can make it a fun and educational experience for kids.
Frequently Asked Questions For Hand Tossed Pizza Dough Recipe
What Ingredients Are Needed For Hand-tossed Pizza Dough?
To make hand-tossed pizza dough, you will need all-purpose flour, dry yeast, sugar, warm water, salt, and olive oil. The exact proportions and additional tips are detailed within the blog post.
How Long Should Pizza Dough Be Kneaded?
Ideally, pizza dough should be kneaded for about 7-10 minutes. This develops the gluten, giving it the perfect texture. It’s important not to under-knead or over-knead, as either can affect the dough’s quality.
Can Hand-tossed Pizza Dough Be Made In Advance?
Yes, hand-tossed pizza dough can be prepared in advance. It’s best used within 48 hours if stored in the refrigerator, or it can be frozen for up to 3 months. Allow it to come to room temperature before tossing.
What Is The Secret To Stretchy Pizza Dough?
The secret to stretchy pizza dough is the proper gluten development achieved through the right balance of kneading and resting time. A well-hydrated dough also contributes to better stretching as it bakes.
Conclusion
Crafting the perfect pizza begins with the ideal dough, and this hand-tossed recipe promises just that. With a balance of simplicity and flavor, it’s the first step to a homemade pizza masterpiece. Gather your ingredients, and in no time, you’ll be the at-home pizza pro your guests rave about.
Pizza night just got a delicious upgrade!